Deploy Qwik-powered websites to shared hosting
Qwik is a front-end web framework that allows developers to build instant-loading websites and apps. It focuses on downloading and executing only the code that is strictly necessary to perform the user-triggered action, achieving a fine-grained lazy-loading approach1. Qwik was created by Miško Hevery, the creator of Angular and AngularJs2. It uses a fine-grained model for isolating the segments of the app that are hydrated on an as-needed basis3. Qwik is very similar to React in terms of its developer’s experience, but under the hood, it has a completely different and much more powerful engine4. Qwik is the only web framework currently capable of getting a 100% score on Lighthouse, a popular Google tool used to measure the speed and usability of a web page2.
Some of the benefits of using Qwik are:
Instant Loading: Qwik does not do hydration because it is resumable. Hydration can take several seconds, depending on the complexity of your application and mobile device speed. Qwik applications are instantly interactive even on slow mobile devices leading to a perfect Google PageSpeed score2.
Resumability: Qwik apps begin their life as SSR/SSG. Qwik serializes the application’s state and framework state into HTML upon rendering the application. Then Qwik can resume execution where the server left off in the browser because all the data Qwik needs is in HTML. No JS needs to be downloaded or executed until it is needed to handle user interaction or rendering2.
Lazy Execution: Qwik introduces the concept of “JavaScript Streaming”, where the page loads instantly and required JavaScript chunks are prefetched in a separate thread, similar to “buffering” in video streaming. The prefetched code only executes upon user action, and that process is called “Lazy Execution”. This performance boost requires no manual effort or decision-making from the developer as this feature is built into Qwik out of the box2.
Reduced Rendering: Upon user interaction, Qwik is surgical about which components it rerenders. This is done through reactivity and allows Qwik to minimize the amount of rendering code downloaded and executed. The reactivity graph is built on the server and restored on the client without needing the application code to be present and re-run2.
Performance that Scales: The amount of code downloaded to the client is proportional to the complexity of the user interaction, not the size of all components on the current route. Your site stays performant even as the complexity of the application grows over time2.
Code Once: Qwik has a single consistent mental model for both server and client code. The same component can begin its lifecycle on the server and process user events on the client. Setup DOM listeners on server render, have them be ready on your client interaction. You know React? You know Qwik2.
Qwik also combines the power of Vite and the pragmatism of tailwindCSS to create beautiful pages. Vite is a build tool that allows you to develop your app with blazing fast hot module replacement (HMR) and optimize it for production with rollup plugins5. TailwindCSS is a utility-first CSS framework that gives you low-level classes to style your elements without writing any custom CSS.
In this post, we will show you how to deploy your Qwik-powered website to a shared hosting that supports Express. This is useful for quick experimentation or personal blogs, although it can support company blogs due to the fast nature of the stack. Most of the time these shared plans are very cheap, for example Namecheap offers a shared plan for $1.44/month with unlimited bandwidth and 20 GB SSD storage. We will use Namecheap as an example, but you can apply this tutorial to any other shared hosting provider that meets these requirements:
- Supports Node.js and Express
- Offers SSH connection
- Allows custom domains
We will also use GitHub as our version control system and GitHub Actions as our continuous integration and deployment tool. We will assume that you have already created a Qwik-powered website following this tutorial or using npm create qwik@latest command.
Step 1: Create a GitHub repository
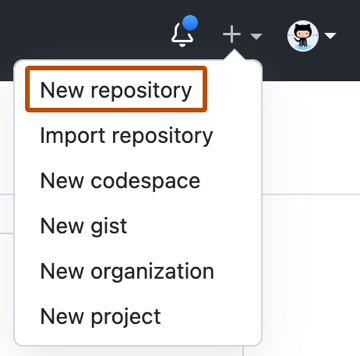
The first step is to create a GitHub repository for your project. You can do this by going to GitHub and clicking on the “New” button on your dashboard.

Give your repository a name, such as “qwik-website”, and optionally add a description and choose whether you want it to be public or private. Then click on “Create repository”.

You will see a page with some instructions on how to push your existing project to GitHub. Follow them by opening your terminal and navigating to your project folder. Then run these commands:
git init
git add .
git commit -m "Initial commit"
git branch -M main
git remote add origin https://github.com/<your-username>/qwik-website.git
git push -u origin main
Replace
After pushing your project, you should see it on your GitHub repository page
Step 2: Create SSH keys
The next step is to create SSH keys that will allow GitHub Actions to connect to your shared hosting via SSH. You can do this by running this command in your terminal:
ssh-keygen -t rsa -b 4096 -C "<your-email>"Replace
This will generate two files: id_rsa (the private key) and id_rsa.pub (the public key). Keep them in a safe place and do not share them with anyone.
Step 3: Add SSH keys to GitHub and Namecheap
The next step is to add your SSH keys to GitHub and Namecheap so that they can communicate securely.
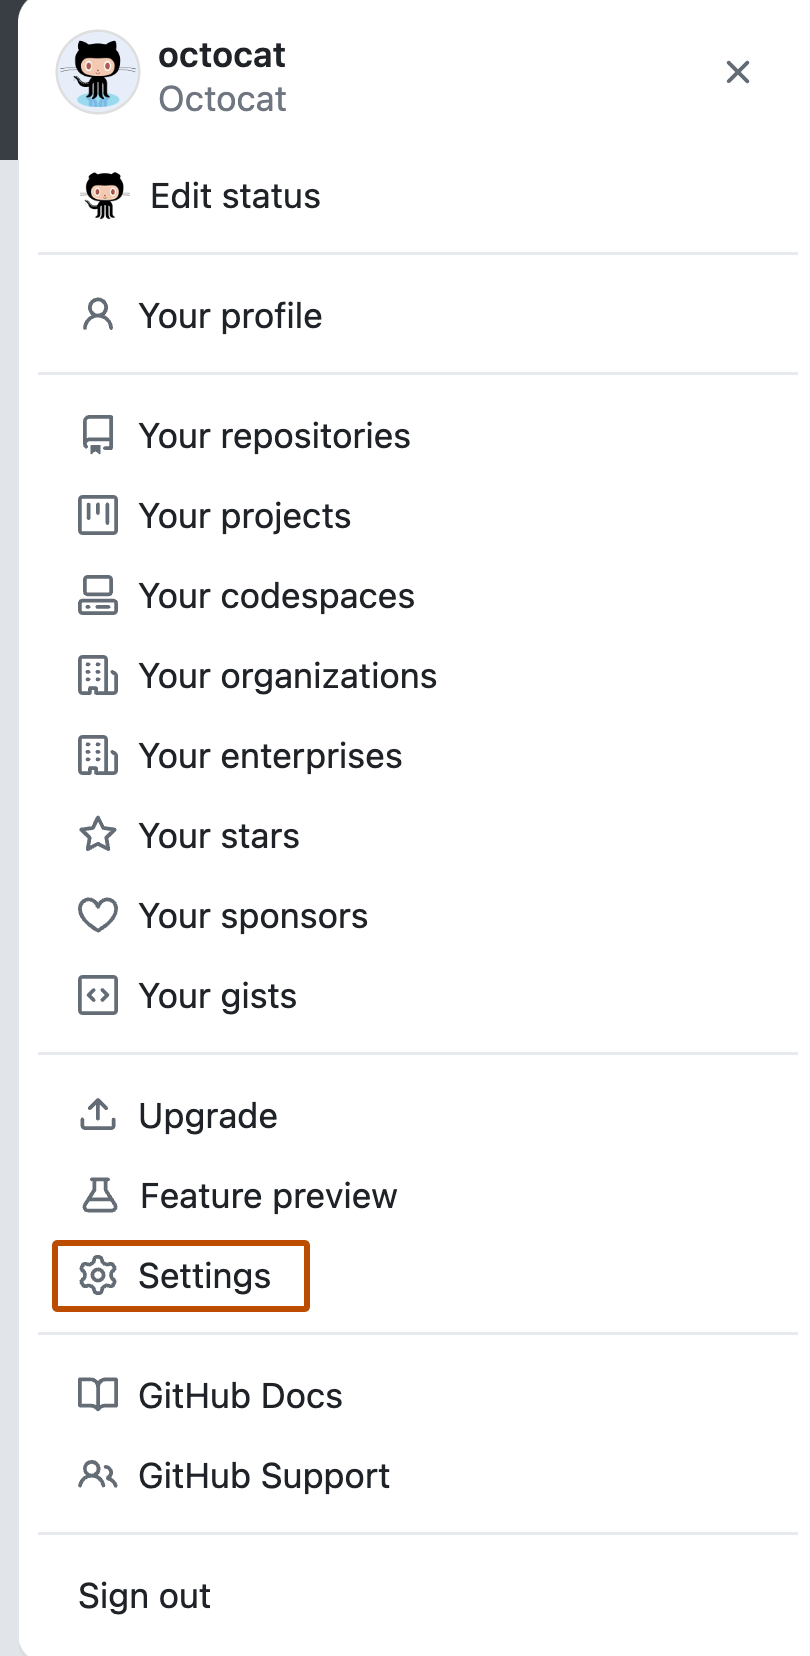
To add your SSH keys to GitHub, go to Settings > SSH and GPG keys and click on “New SSH key”.

Give your key a title, such as “Namecheap”, and paste the contents of your id_rsa.pub file into the “Key” field. Then click on “Add SSH key”.
To add your SSH keys to Namecheap, go to cPanel > Security > SSH Access and click on “Manage SSH Keys”. Then click on “Import Key”.
Give your key a name, such as “GitHub”, and paste the contents of your id_rsa file into the “Private Key” field. Leave the passphrase field blank if you did not set one when generating your keys. Then click on “Import”.
You should see a message saying that your key was imported successfully. Then click on “Manage” next to your key name. Then click on “Authorize”.
You should see a message saying that your key was authorized successfully.
Step 4: Create GitHub Actions workflow
The next step is to create a GitHub Actions workflow that will automate the deployment process for your project. You can do this by creating a file named .github/workflows/deploy.yml in your project folder with this content:
name: Deploy

on:
  push:
    branches: [ main, staging ]

jobs:
  build:
    runs-on: ubuntu-latest

    steps:
      - name: Checkout
        uses: actions/checkout@v2

      - name: Install dependencies
        run: npm install

      - name: Build project
        run: npm run build

      - name: Zip dist folder
        run: zip -r dist.zip dist

      - name: Setup rsync
        uses: GuillaumeFalourd/setup-rsync@v1.1

      - name: Deploy to Namecheap
        uses: up9cloud/action-rsync@master
        env:
          HOST: ${{ vars.DEPLOY_HOST }}
          USER: ${{ vars.DEPLOY_USER }}
          KEY: ${{ secrets.KEY }}
          PORT: ${{ vars.DEPLOY_PORT }}
          SOURCE: dist.zip
          TARGET: /home/$USER/qwik-website.com/${{ github.ref }}
          SSH_ARGS: -p 21098 -o UserKnownHostsFile=/dev/null -o StrictHostKeyChecking=no -o LogLevel=quiet -o HostKeyAlgorithms=+ssh-rsa -o PubkeyAcceptedKeyTypes=+ssh-rsa
          ARGS_MORE: --rsync-path="mkdir -p /home/$USER/qwik-website/${{ github.ref }} && mkdir -p /home/$USER/qwik-website.com/deploys && rsync"

      - name: Create Private Key File
        run: echo "${{secrets.KEY}}" > deploy_rsa && chmod 400 deploy_rsa

      - name: Get current date
        id: date
        run: echo "::set-output name=date::$(date +'%Y%m%d%H%M%S')"

      - name: Unzip dist folder
        run: ssh -o StrictHostKeyChecking=no -o HostKeyAlgorithms=+ssh-rsa -o PubkeyAcceptedKeyTypes=+ssh-rsa -p ${{ vars.DEPLOY_PORT }} -i deploy_rsa ${{ vars.DEPLOY_USER }}@${{ vars.DEPLOY_HOST }} "unzip -o /home/${{ vars.DEPLOY_USER }}/qwik-website.com/${{ github.ref }}/dist.zip -d /home/${{ vars.DEPLOY_USER }}/qwik-website.com/deploys/${{steps.date.outputs.date}}"

      - name: Update current symlink
        run: ssh -o StrictHostKeyChecking=no -o HostKeyAlgorithms=+ssh-rsa -o PubkeyAcceptedKeyTypes=+ssh-rsa -p ${{ vars.DEPLOY_PORT }} -i deploy_rsa ${{ vars.DEPLOY_USER }}@${{ vars.DEPLOY_HOST }} "ln -sfn /home/${{ vars.DEPLOY_USER }}/qwik-website.com/deploys/${{steps.date.outputs.date}}/dist /home/${{ vars.DEPLOY_USER }}/qwik-website.com/current"

      - name: Cleanup old deploys
        run: ssh -o StrictHostKeyChecking=no -o HostKeyAlgorithms=+ssh-rsa -o PubkeyAcceptedKeyTypes=+ssh-rsa -p ${{ vars.DEPLOY_PORT }} -i deploy_rsa ${{ vars.DEPLOY_USER }}@${{ vars.DEPLOY_HOST }} "ls -dt /home/${{ vars.DEPLOY_USER }}/qwik-website.com/deploys/* | tail -n +4 | xargs rm -rf"
Let’s explain what each step does:
- Checks out your repository using the actions/checkout action.
- Installs the dependencies for your project using npm install.
- Build your project using npm run build. This will generate a dist folder with the static files for your website.
- Zip the dist folder into a dist.zip file using zip command.
- Sets up rsync using the GuillaumeFalourd/setup-rsync action. This will install rsync on the runner machine and add it to the PATH.
- Deploys the dist.zip file to Namecheap using the up9cloud/action-rsync action. This will use rsync over ssh to copy the file to the remote server. You need to set some environment variables for this step, such as HOST, USER, and KEY, which are the same values that you used for adding SSH keys in the previous step. You can store them as secrets in your GitHub repository settings. You also need to set SOURCE and TARGET, which are the paths for the source and destination folders. In this case, we use dist.zip as the source and /home/${{ secrets.USER }}/qwik-website/${{ github.ref }} as the target. The ${{ github.ref }} is a context variable that represents the branch name of the push event, such as main or staging. This way, we can deploy different branches to different folders on Namecheap. We also set ARGS_MORE to specify some extra arguments for rsync, such as --rsync-path, which allows us to create the target folder if it does not exist before copying the file. For namecheap and other hostings, we might need to set SSH_ARGS to specify some extra arguments for ssh, such as the Hosting algorithm for the private key file.
- Unzips the dist.zip file into the target folder using ssh and unzip commands. This will extract the static files for your website into /home/${{ secrets.USER }}/qwik-website/${{ github.ref }}/dist.
- Updates the current symlink using ssh and ln commands. This will create or update a symbolic link named /home/${{ secrets.USER }}/public_html/current that points to /home/${{ secrets.USER }}/qwik-website/${{ github.ref }}/dist. This way, we can serve our website from a single URL regardless of which branch we deploy.
- Cleans up old deploys using ssh, ls, and rm commands. This will list all the folders under /home/${{ secrets.USER }}/qwik-website/, sort them by date, skip the first three (the latest ones), and delete the rest. This way, we can keep only three previous deploys for each branch and save some disk space.
Step 5: Test your workflow
The final step is to test your workflow by pushing some changes to your GitHub repository. You can do this by editing any file in your project, such as adding some content or changing some styles, and then committing and pushing your changes.
git add .
git commit -m "Some changes"
git push origin main # or staging
You should see a new workflow run on your GitHub Actions tab.

You can click on it to see the details of each step and check if everything went well.
If everything is successful, you should be able to see your website deployed on Namecheap by visiting your custom domain or http://
Congratulations! You have successfully deployed your Qwik-powered website to a shared hosting using GitHub Actions!
Conclusion
In this post, we have shown you how to deploy your Qwik-powered website to a shared hosting that supports Express using GitHub Actions. We have explained the benefits of using Qwik as a front-end web framework that delivers instant-loading web applications at any size or complexity. We have also demonstrated how to use rsync over ssh to copy and unzip files on a remote server, how to use symbolic links to serve different branches from a single URL, and how to clean up old deploys to save disk space.
We hope you enjoyed this tutorial and learned something new. If you have any questions or feedback, please let us know in the comments below.
Happy coding! 🚀
